Console.log 的使用方式 在Next.js 16版,有一個新的開發技巧。
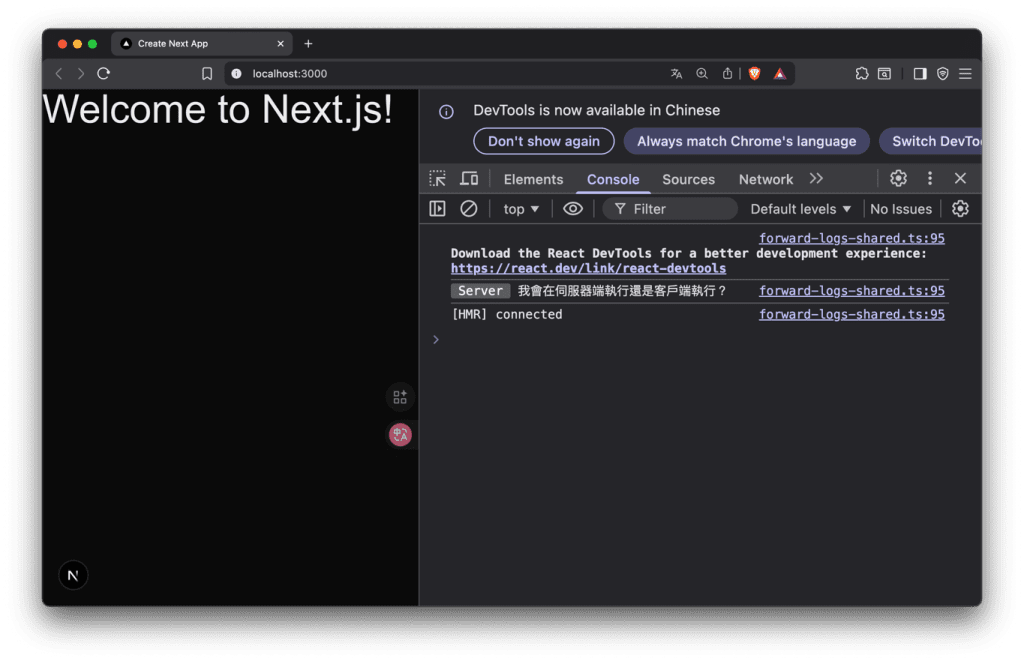
我們在Home裡面加上一個console.log,以往的經驗來說這是一個伺服器端的事件,所以在瀏覽器的Console中並不會出現這段輸出內容。
1
2
3
4
5
6
7
8
const Home = () => { console.log("我會在伺服器端執行還是客戶端執行?"); return ( <div className="text-5xl">Welcome to Next.js!</div> ) } <div></div> export default Home
1
2
3
4
5
6
7
8
const Home = () => { console.log("我會在伺服器端執行還是客戶端執行?"); return ( <div className="text-5xl">Welcome to Next.js!</div> ) } export default Home
正常來說只會在伺服器端看到。
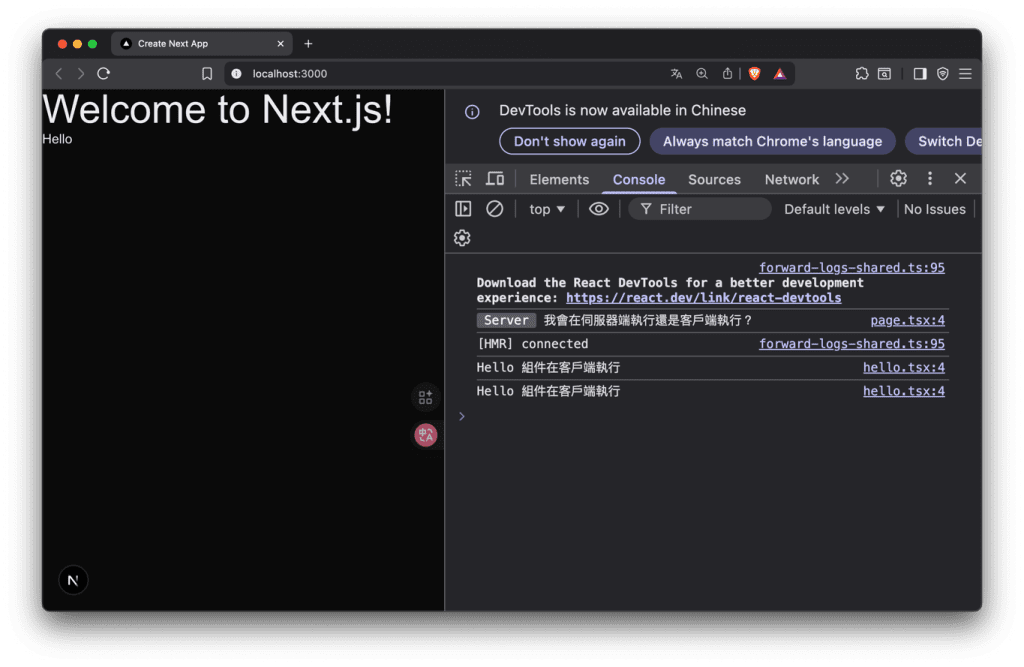
可以看到在瀏覽器一樣出現了標示Server的Console內容。
不過不用擔心,這只是在開發的時候方便觀察而已。
這個時候有趣的來了,我要來測試在Client端寫console.log會發生什麼事情,我在app底下建立components資料夾並建立一個hello.tsx檔案。
1
2
3
4
5
6
7
8
9
10
11
// components/hello.tsx "use client" <div></div> const Hello = () => { console.log("Hello 組件在客戶端執行"); return ( <div>Hello</div> ) } <div></div> export default Hello
1
2
3
4
5
6
7
8
9
10
11
// components/hello.tsx "use client" const Hello = () => { console.log("Hello 組件在客戶端執行"); return ( <div>Hello</div> ) } export default Hello
將hello的components引入到app/page.tsx。
1
2
3
4
5
6
7
8
9
10
11
12
13
14
// app/page.tsx import Hello from "@/components/hello" <div></div> const Home = () => { console.log("我會在伺服器端執行還是客戶端執行?"); return ( <main> <div className="text-5xl">Welcome to Next.js!</div> <Hello /> </main> ) } <div></div> export default Home
1
2
3
4
5
6
7
8
9
10
11
12
13
14
// app/page.tsx import Hello from "@/components/hello" const Home = () => { console.log("我會在伺服器端執行還是客戶端執行?"); return ( <main> <div className="text-5xl">Welcome to Next.js!</div> <Hello /> </main> ) } export default Home
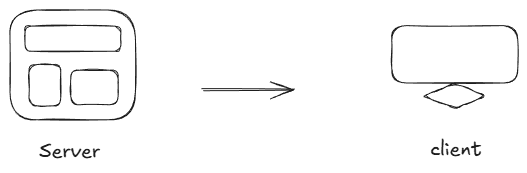
這時候到瀏覽器觀察。會發現有兩個一樣的log。
你可能會問為什麼?我用一張圖給你看看。
在Server端會先建立好static shell,之後在Client端渲染。
React
1 npm install babel-plugin-react-compiler@latest
1 npm install babel-plugin-react-compiler@latest
在next.config.ts加上reactCompiler: true,
1
2
3
4
5
6
7
8
9
10
11
import type { NextConfig } from "next"; <div></div> const nextConfig: NextConfig = { reactCompiler: true, experimental: { turbopackFileSystemCacheForDev: true } <div></div> }; <div></div> export default nextConfig;
1
2
3
4
5
6
7
8
9
10
11
import type { NextConfig } from "next"; const nextConfig: NextConfig = { reactCompiler: true, experimental: { turbopackFileSystemCacheForDev: true } }; export default nextConfig;
因為我對React沒有很熟悉,所以我問了一下ChatGpt。
babel-plugin-react-compiler 能做的事
自動最佳化 React 重新渲染
自動 memo 化 computation
減少 performance bug
用更少的 hooks 寫法就能達到最佳性能
讓 React 程式碼更簡潔、效果更穩定
未來會成為 React 的標準性能工具(官方推薦)
Router
你會看到一個layout.tsk,可以想成是一個網站的佈局,像是header跟footer可以先放好位置,這樣每一個頁面就不必再重複渲染,然後{children}是每一個頁面的進入點,這邊舉個例子像這樣:
Page是你的網站首頁的內容,一進去會先吃到app/page.tsx然後傳到layout.tsx裡面的{children}這裡。
以剛剛的例子:
1
2
3
4
5
6
7
8
9
10
11
12
13
14
// app/page.tsx import Hello from "@/components/hello" <div></div> const Home = () => { console.log("我會在伺服器端執行還是客戶端執行?"); return ( <main> <div className="text-5xl">Welcome to Next.js!</div> <Hello /> </main> ) } <div></div> export default Home
1
2
3
4
5
6
7
8
9
10
11
12
13
14
// app/page.tsx import Hello from "@/components/hello" const Home = () => { console.log("我會在伺服器端執行還是客戶端執行?"); return ( <main> <div className="text-5xl">Welcome to Next.js!</div> <Hello /> </main> ) } export default Home
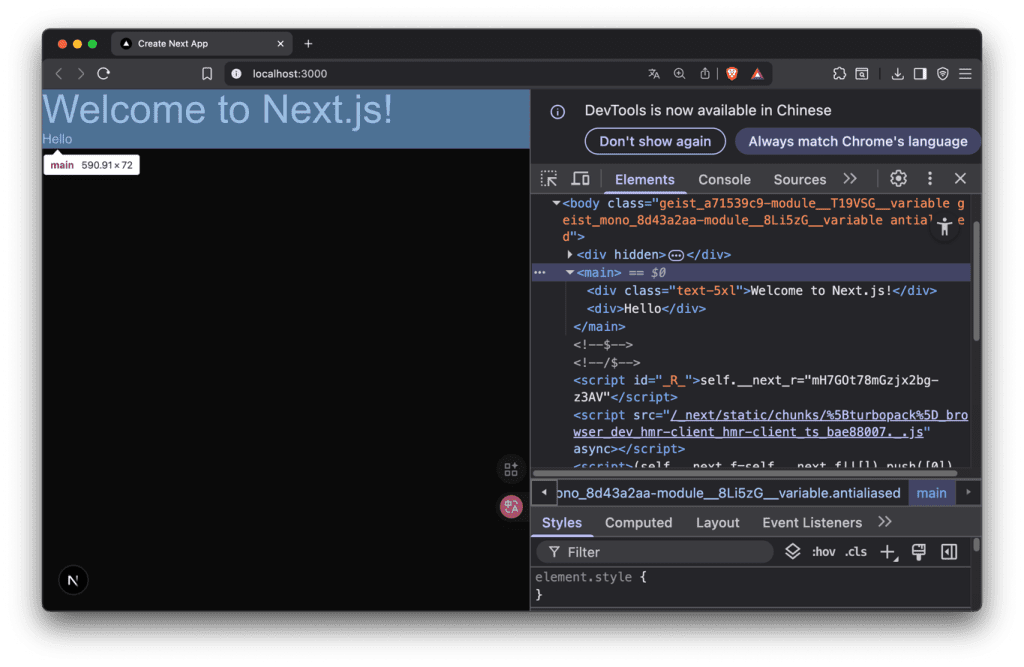
觀察一下瀏覽器的 Elements,已經把app/page.tsx的內容傳到{children}並顯示。
補充:Components不能放在app/資料夾內,app是放Page的地方。
新增一個 Route 直接在app/建立一個資料夾,這邊建立一個about資料夾,跟一個page.tsx。
1
2
3
4
5
6
7
8
app/about/page.tsx const Page = () => { return ( <div>Page</div> ) } <div></div> export default Page
1
2
3
4
5
6
7
8
app/about/page.tsx const Page = () => { return ( <div>Page</div> ) } export default Page
只要在你的網頁打/about路由就會看到Page了。這個在Next.js叫做Filebased routing system。
以下是官方文件的Route示意圖:
Nested Routes 巢狀路由 我建立了一個dashboard,並在dashboard在建立兩個資料夾分別是analytics跟users。
1
2
3
4
5
6
7
8
// analytics/page.tsx const Analytics = () => { return ( <div>Analytics</div> ) } <div></div> export default Analytics
1
2
3
4
5
6
7
8
// analytics/page.tsx const Analytics = () => { return ( <div>Analytics</div> ) } export default Analytics
1
2
3
4
5
6
7
8
// users/page.tsx const Users = () => { return ( <div>Users</div> ) } <div></div> export default Users
1
2
3
4
5
6
7
8
// users/page.tsx const Users = () => { return ( <div>Users</div> ) } export default Users
進到 http://localhost:3000/dashboard/analytics 就可以看到 Analytics
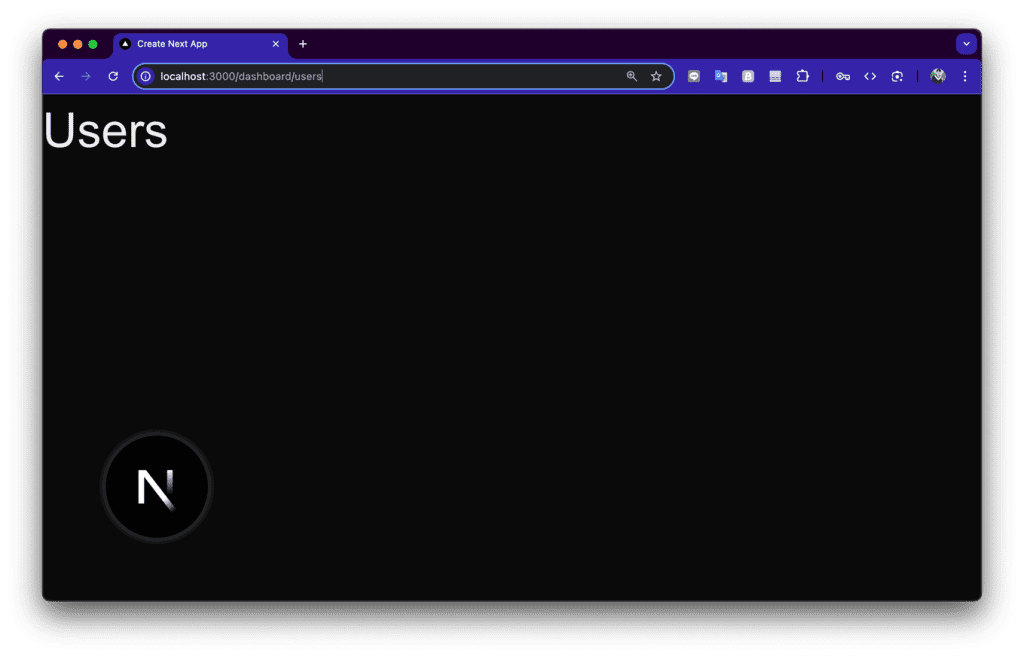
進到 http://localhost:3000/dashboard/users 就可以看到 Users
那我們可能會有很多User,每個User都要有自己的Dashboard介面。
因此先在users底下建立一個[id]資料夾,他可以根據你傳進來的params,對應到不同Users的頁面資料。
將每個User外面包一個Link,對應到不同的使用者。將參數傳送到users/[id]。
1
2
3
4
5
6
7
8
9
10
11
12
13
14
15
16
17
18
19
// users/page.tsx import Link from "next/link" <div></div> const Users = () => { return ( <div> <h1>Dashboard Users</h1> <div></div> <ul className="mt-10"> <li><Link href="/dashboard/users/1">User 1</Link></li> <li><Link href="/dashboard/users/2">User 2</Link></li> <li><Link href="/dashboard/users/3">User 3</Link></li> <li><Link href="/dashboard/users/4">User 4</Link></li> </ul> </div> ) } <div></div> export default Users
1
2
3
4
5
6
7
8
9
10
11
12
13
14
15
16
17
18
19
// users/page.tsx import Link from "next/link" const Users = () => { return ( <div> <h1>Dashboard Users</h1> <ul className="mt-10"> <li><Link href="/dashboard/users/1">User 1</Link></li> <li><Link href="/dashboard/users/2">User 2</Link></li> <li><Link href="/dashboard/users/3">User 3</Link></li> <li><Link href="/dashboard/users/4">User 4</Link></li> </ul> </div> ) } export default Users
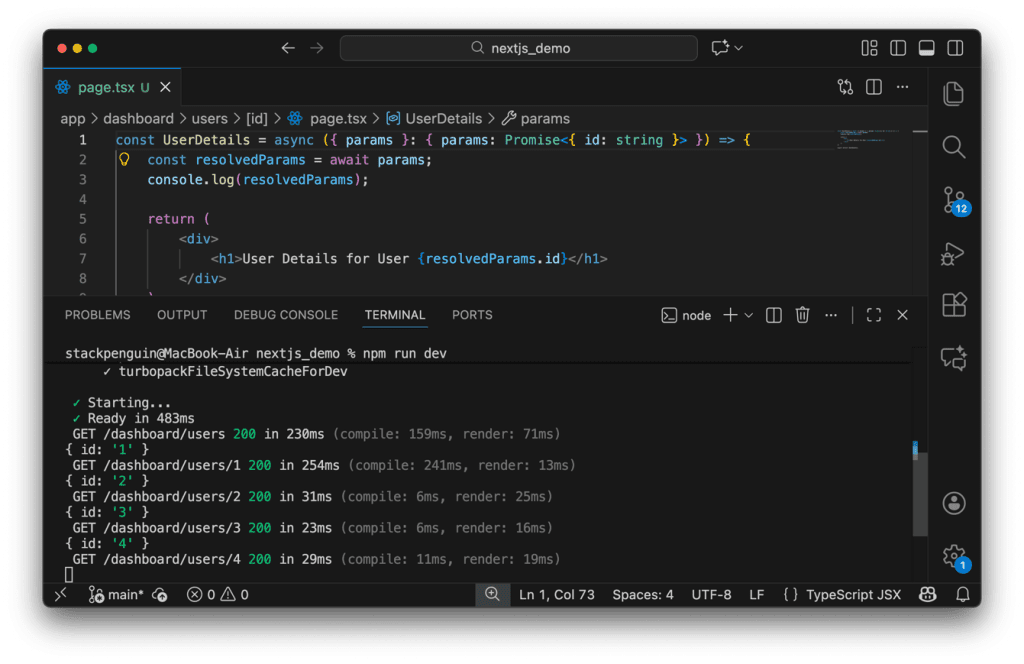
收到了點擊Link之後傳過來的參數,並顯示使用者id。
1
2
3
4
5
6
7
8
9
10
11
// users/[id]/page.tsx const UserDetails = async ({ params } : { params: Promise<{ id: string }> }) => { const { id } = await params; return ( <div> <h1>User Details for User {id}</h1> </div> ) } <div></div> export default UserDetails
1
2
3
4
5
6
7
8
9
10
11
// users/[id]/page.tsx const UserDetails = async ({ params } : { params: Promise<{ id: string }> }) => { const { id } = await params; return ( <div> <h1>User Details for User {id}</h1> </div> ) } export default UserDetails
這邊我在學的時候第一次看到{params}這種語法,其實是簡化了以下的程式碼:
1
2
3
const UserDetails = async (props) => { const params = props.params; }
1
2
3
const UserDetails = async (props) => { const params = props.params; }
補充:在 JavaScript 中,所有非同步行為(例如 fetch、資料庫、計時器)最後得到的都是 Promise 才會使用到async、await。這裡的 id其實還不需要用到 await 因為傳來的資料是同步的如下:
1
2
3
4
5
6
7
{ id: "1" } or { id: "2" } or { id: "3" } or { id: "4" }
1
2
3
4
5
6
7
{ id: "1" } or { id: "2" } or { id: "3" } or { id: "4" }
Layout 版面設定 請注意!必須使用 layout.tsx 這個檔案名稱,否則 next.js會認不出來。
我在app/dashboard底下新增layout.tsx
1
2
3
4
5
6
7
8
9
10
const Layout = ({ children } : { children: React.ReactNode}) => { return ( <div> <div>Dashboard Navbar</div> {children} </div> ) } <div></div> export default Layout;
1
2
3
4
5
6
7
8
9
10
const Layout = ({ children } : { children: React.ReactNode}) => { return ( <div> <div>Dashboard Navbar</div> {children} </div> ) } export default Layout;
{ children } : { children: React.ReactNode} 的意思是:
這個 component 的 props 有一個 children,而它的型別是 React.ReactNode
React.ReactNode = 可以被 React 放在畫面上的東西
完整的說就是從 props 拿出 children,並且保證它是 React 可渲染的內容。
Route Groups Route Groups 讓你能夠建立資料夾而且不會影響到 URL。
如果你想要建立一個Layout.tsx,但是不想要當成一個路由,可以使用(admin),這種括號的方式包起來。
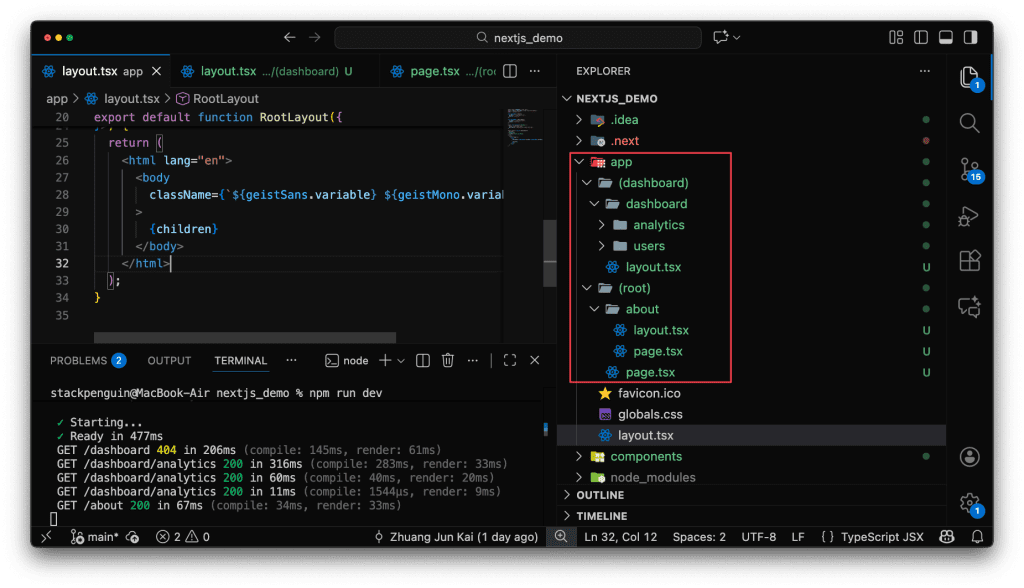
以我的資料夾來看:
首頁 http://localhost:3000 會吃到 (root) 底下的page.tsx。
about的話也是會忽略(root)資料夾,指向 http://localhost:3000/about
dashboard也是相同的道理,外層(dashboard)不會吃,會吃內層的dashboard資料夾。
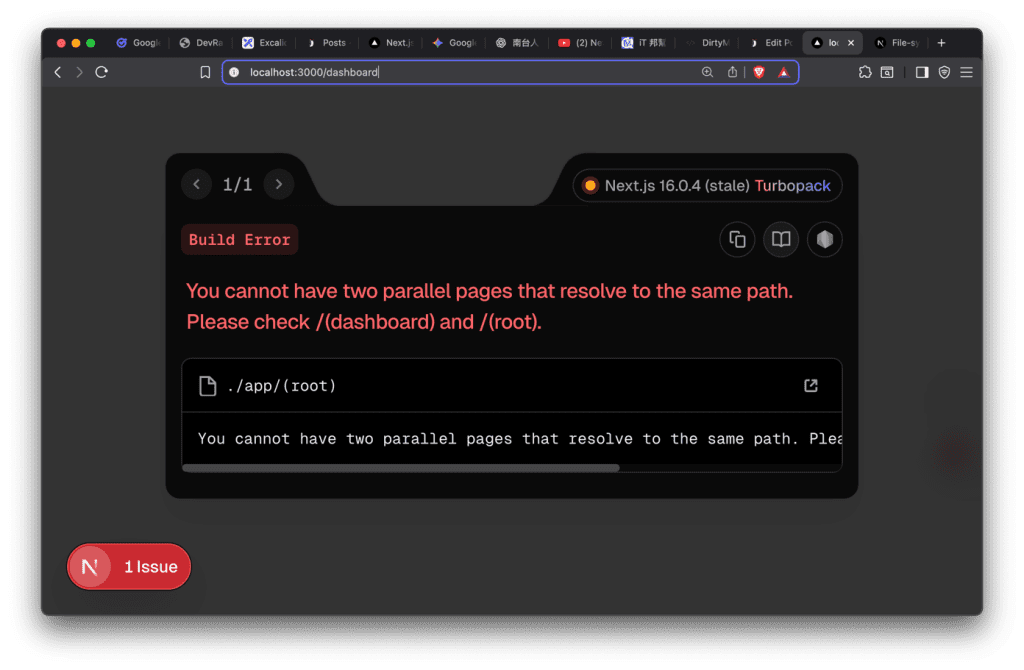
我們可以分別在(dashboard)跟(root)設定不同的layout。並且把最外部原來的page.tsx移動到(root)。
但是要注意,使用括號()的資料夾底下,只能在其中一個保留page.tsx,否則會出現以下錯誤。
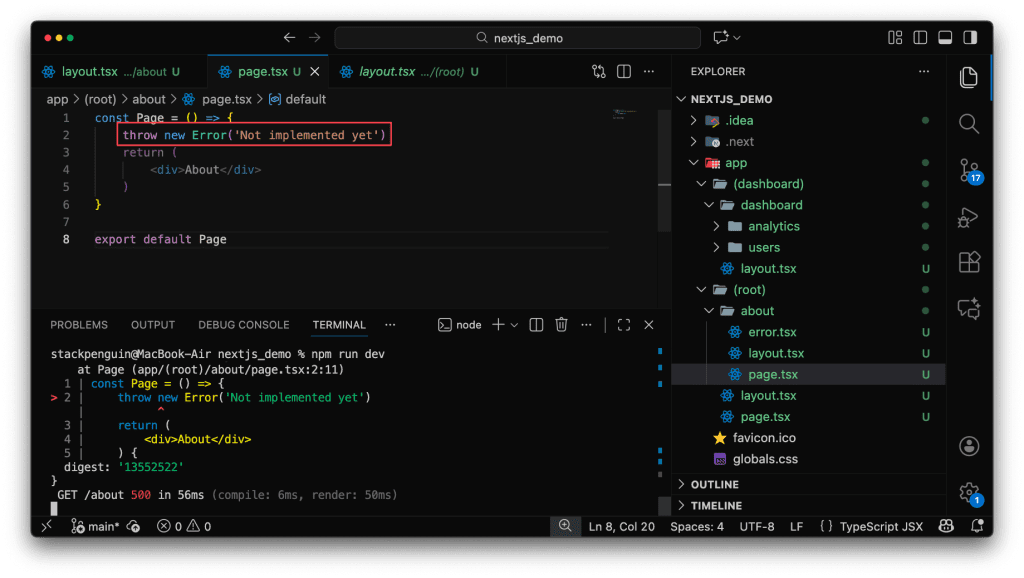
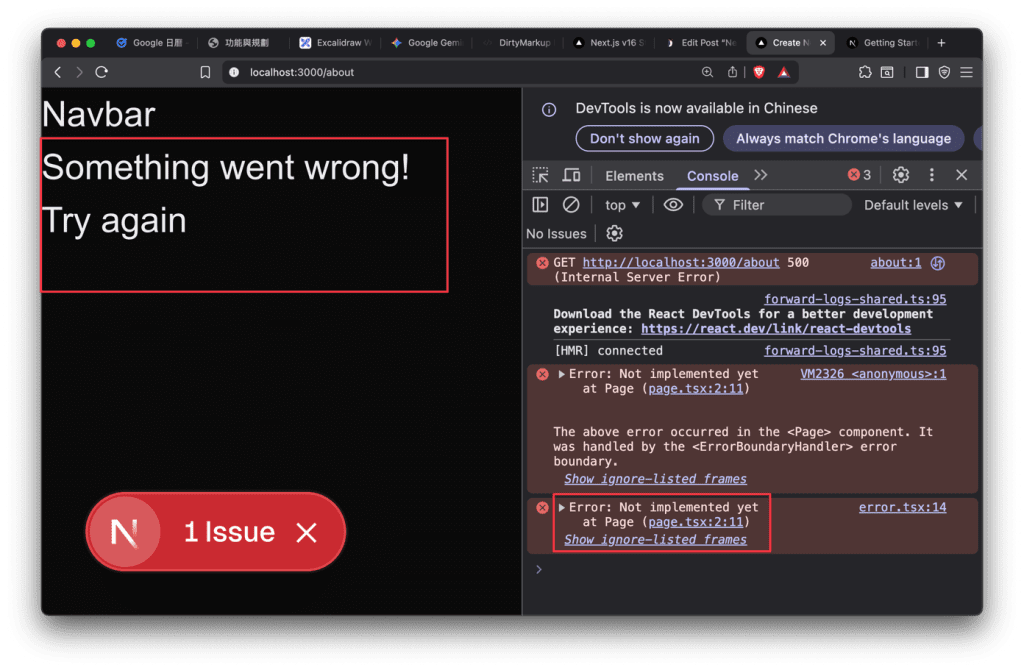
Error Handling 錯誤處理 當 Server Component 或 route segment 渲染失敗時,Next.js 會顯示你寫在 error.tsx 的 UI。
而不是預設簡陋的錯誤頁。像是我在about的page寫一個Error,並在about底下建立一個error.tsx。
並進入到about頁面觀察。
1
2
3
4
5
6
7
8
9
10
11
12
13
14
15
16
17
18
19
20
21
22
23
24
25
26
27
28
29
30
31
// about/error.tsx 'use client' // Error boundaries must be Client Components import { useEffect } from 'react' export default function Error({ error, reset, }: { error: Error & { digest?: string } reset: () => void }) { useEffect(() => { // Log the error to an error reporting service console.error(error) }, [error]) return ( <div> <h2>Something went wrong!</h2> <button onClick={ // Attempt to recover by trying to re-render the segment () => reset() } > Try again </button> </div> ) }
可以看到在畫面有顯示文字,同時也可以在console中看到錯誤。
Console只在「開發模式(npm run dev)」才會出現
所以return的部分顯示在前端,useEffect的部分是顯示在後端。
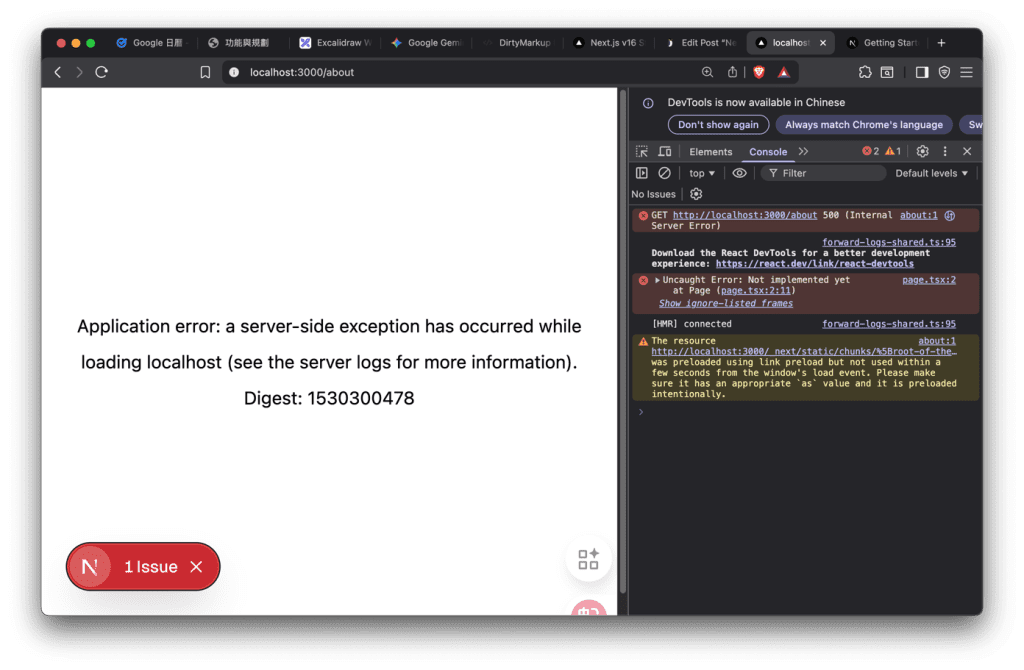
預設的狀態只能看到簡陋的一些文字,無法讓使用者了解目前的狀態。
有了error.tsx,可以呈現一些相關的錯誤訊息給使用者,讓使用者知道目前網站的狀態。
不用擔心重要的資訊外露,因為在client端不會顯示重要訊息,我是把它想成美化error頁面。
Loading UI 載入畫面 在Next.js改如何使用Loading的效果呢?
以下是一個抓取api等待時間的loading效果展示。
1
2
3
4
5
6
7
8
9
10
11
const Page = async () => { const res = await fetch("https://jsonplaceholder.typicode.com/users/1"); const user = await res.json(); return ( <div> <div>{user.name}</div>; </div> ) } <div></div> export default Page
1
2
3
4
5
6
7
8
9
10
11
const Page = async () => { const res = await fetch("https://jsonplaceholder.typicode.com/users/1"); const user = await res.json(); return ( <div> <div>{user.name}</div>; </div> ) } export default Page
只要在app/底下建立一個loading.tsx,就會有Loading的效果,它的作用範圍是全站 (global loading UI)。
只要任何 page.tsx 或 layout.tsx 在 await 資料,
Data Fetching 資料截取 第一種方式是透過前端渲染畫面。
但是不推薦,會有延遲,而且原始碼很空SEO效果不好。
1
2
3
4
5
6
7
8
9
10
11
12
13
14
15
16
17
18
19
20
21
22
23
24
25
26
27
28
29
30
31
32
33
"use client"; <div></div> import { useState,useEffect } from 'react'; <div></div> function album1() { const [albums, setAlbums] = useState([]); <div></div> useEffect(() => { const fetchAlbums = async () => { try { const response = await fetch("https://jsonplaceholder.typicode.com/albums") const data = await response.json(); setAlbums(data); } catch (error) { console.error("Error fetching albums:", error); } }; fetchAlbums(); }, []); <div></div> return ( <div className=''> {albums.map((album: {id: number; title: string}) => ( <div key={album.id} className=''> <h3>{album.title}</h3> <p>Album ID: {album.id}</p> </div> ))} </div> ) } <div></div> export default album1;
1
2
3
4
5
6
7
8
9
10
11
12
13
14
15
16
17
18
19
20
21
22
23
24
25
26
27
28
29
30
31
32
33
"use client"; import { useState,useEffect } from 'react'; function album1() { const [albums, setAlbums] = useState([]); useEffect(() => { const fetchAlbums = async () => { try { const response = await fetch("https://jsonplaceholder.typicode.com/albums") const data = await response.json(); setAlbums(data); } catch (error) { console.error("Error fetching albums:", error); } }; fetchAlbums(); }, []); return ( <div className=''> {albums.map((album: {id: number; title: string}) => ( <div key={album.id} className=''> <h3>{album.title}</h3> <p>Album ID: {album.id}</p> </div> ))} </div> ) } export default album1;
另一種方式是伺服器先跑完才放到前端,這種方式速度會更快,用更少的程式碼。
本地開發npm run dev的時候會有Server Components HMR快取,代表會有更快的回應速度,減少呼叫api的次數。
1
2
3
4
5
6
7
8
9
10
11
12
13
14
15
16
17
18
19
20
21
22
23
24
25
26
27
28
29
30
31
32
33
34
35
36
async function AlbumsPage() { const response = await fetch("https://jsonplaceholder.typicode.com/albums"); if (!response.ok) throw new Error("Failed to fetch data"); <div></div> const albums = await response.json(); <div></div> return ( <main className="min-h-screen bg-slate-50 py-8"> <div className="max-w-4xl mx-auto px-4"> <h1 className="text-2xl font-semibold text-slate-900 mb-6"> Albums </h1> <div></div> <div className="grid grid-cols-1 sm:grid-cols-2 md:grid-cols-3 gap-4"> {albums.map((album: { id: number; title: string }) => ( <div key={album.id} className="bg-white rounded-lg border border-slate-200 p-4 shadow-sm hover:shadow-md hover:-translate-y-0.5 transition-transform transition-shadow duration-150" > <h3 className="text-base font-semibold text-slate-900 mb-1"> {album.title} </h3> <p className="text-xs text-slate-500"> ID: {album.id} </p> </div> ))} </div> </div> </main> ); } <div></div> export default AlbumsPage;
1
2
3
4
5
6
7
8
9
10
11
12
13
14
15
16
17
18
19
20
21
22
23
24
25
26
27
28
29
30
31
32
33
34
35
36
async function AlbumsPage() { const response = await fetch("https://jsonplaceholder.typicode.com/albums"); if (!response.ok) throw new Error("Failed to fetch data"); const albums = await response.json(); return ( <main className="min-h-screen bg-slate-50 py-8"> <div className="max-w-4xl mx-auto px-4"> <h1 className="text-2xl font-semibold text-slate-900 mb-6"> Albums </h1> <div className="grid grid-cols-1 sm:grid-cols-2 md:grid-cols-3 gap-4"> {albums.map((album: { id: number; title: string }) => ( <div key={album.id} className="bg-white rounded-lg border border-slate-200 p-4 shadow-sm hover:shadow-md hover:-translate-y-0.5 transition-transform transition-shadow duration-150" > <h3 className="text-base font-semibold text-slate-900 mb-1"> {album.title} </h3> <p className="text-xs text-slate-500"> ID: {album.id} </p> </div> ))} </div> </div> </main> ); } export default AlbumsPage;
回到伺服器端跟客戶端之間的差別,伺服器端的方式有更多好處,像是載入的時間比較快,FCP表現更好。
也因為在server就先載入好,所以在瀏覽器可以查看到所有原始碼SEO相對也會比較好。
參考 JavaScript Mastery 的教學影片 https://www.youtube.com/watch?v=I1V9YWqRIeI&t=1540s